How To Install Mods
For Minecraft

Guide for Installing Minecraft Mods
The following guides are designed to help you easily install Minecraft mods. The mod manager guide uses the free ModDrop installer. ModDrop is super easy to use so even less experienced users should be able to start using mods right away. It also comes with numerous specialized features for more advanced players.
The manual installation guide is for those that prefer to install mods manually. If you’re playing on Mac or Linux, the manual approach is currently the only option. We hope you find these guides useful. If you’d like to contact us, you can reach us at: questions (at) installminecraftmods (.) com. Good luck and have fun!

Installing Mods
With A Mod Manager
Using Moddrop
This guide uses our free “ModDrop” mod manager. ModDrop automatically installs Forge and sets up Minecraft for you. We tried to make ModDrop super easy so anyone can start using mods right away. It also comes with numerous specialized features for more advanced players. Enjoy!

Step One - Setup
To get the ModDrop client, go to ModDrop and sign up for a Free account.
Next, download and install the client from the same site.

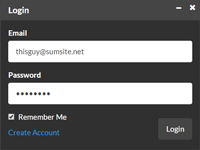
Once ModDrop is installed, open the client and login to your account with your Email and Password.
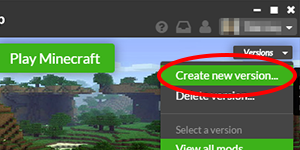
Select Minecraft on the left side. On the right side go to Versions and then Create New Version...
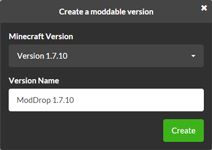
Fill out the information and then click Create
If ModDrop tells you "You must play Minecraft Version <version> at least once before you can create a moddable version of it" then proceed to next operation.
If everything goes fine then jump to Step Two - Install Mods.
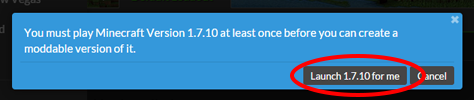
If ModDrop tells you "You must play Minecraft Version <version> at least once before you can create a moddable version of it" then click Launch <version> for me.
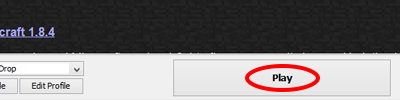
When the Minecraft Launcher starts, Just click Play. It will already be configured to use the correct version.
Once Minecraft has successfully started, close Minecraft and go to the previous operation to try making a Minecraft version again.
Step Two - Install Mods
To add a mod, download any mod from your favorite modding website but don’t extract it.
Take the downloaded ZIP, RAR, or other file and drag and drop it into the ModDrop client's library.
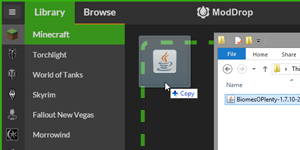
Choose Minecraft as the game on the right side, if it isn’t already selected. Then click Add Mods.

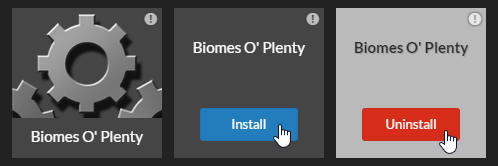
The mods will appear in your library once it has finished being converted.
To install or uninstall mods, move the mouse cursor over the mod and click the Install or Uninstall button.
To change a mod’s name or other information, click anywhere on the mod.
Then choose the dropdown menu next to the Install or Uninstall button and choose Edit.

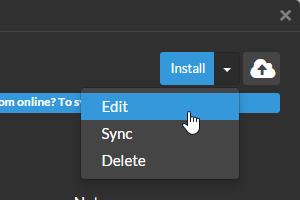
Make any changes you want and then click Save Changes.
Installing Mods
With A Mod Manager
Using Forge
This guide is for those that prefer to install mods manually. If you’re playing on Mac or Linux, the manual approach is currently the only option. We’ve tried to cover all the basics so you can get setup up as quickly as possible. If you find the steps below difficult and you are playing on a windows computer, you may want to try the mod manager guide instead. Good Luck!

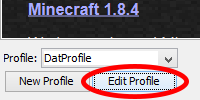
Step One - Setup Minecraft
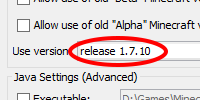
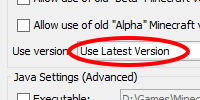
Click Edit Profile in the Minecraft Launcher and set Use version to the version of Minecraft you want. For example: 1.7.10 or 1.8
Save the profile and click Play so Minecraft will download all the necessary files.
Close Minecraft and any open launchers once Minecraft has successfully started.
Change your profile's Use version back to Use Latest Version or whatever was selected before changing it. Make sure to close any open Minecraft Launchers when done.
This will allow you to keep playing the Minecraft version you were using before on your main profile.
Step Two - Setup Minecraft Forge
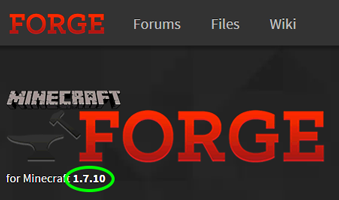
First go to the official Minecraft Forge website.
Select the same version of Forge as the version of Minecraft you chose earlier if it is not already selected.
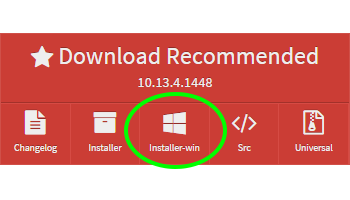
Download the Recommended Installer for your version of Forge.
Option 1: If you are using Windows you can download the Win Installer. This will allow you to install Forge if you don’t have Java installed and used the MSI installer to install Minecraft.
Option 2: If you are not using Windows or know you have Java installed, get the regular installer instead.

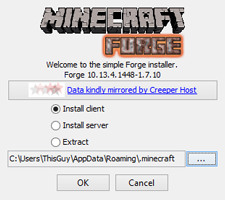
Open the previously downloaded forge installer and choose Install client if it is not already selected. Then click OK
If the installer complains that Minecraft hasn’t been run, make sure you grabbed the correct version of Forge and then see Setup Minecraft.
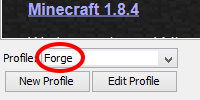
Open Minecraft Launcher and change profile to Forge if it isn’t selected. Click Edit Profile.
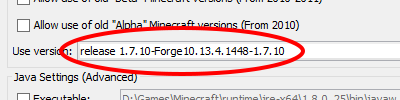
Change Use version to be the newly created version if it doesn't match the newly installed version of Forge.
The newly created version should be near the bottom of the list and will have a name that contains Forge and the version of Minecraft you want to use.
Step Three - Installing Mods
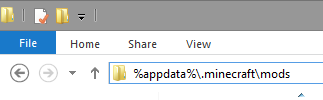
Open your mods folder. It can be found by going to %appdata%\.minecraft\mods or by opening the Minecraft Launcher and clicking Edit Profile then Open Game Dir and then opening the mods folder.

Copy any .zip or .jar files (mods) you want to use into the mods folder.

To uninstall a mod, remove it from the mods folder.
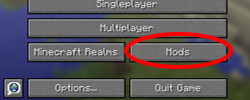
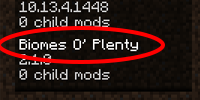
Verify mods are installed by running the game and clicking Mods and checking if your mods are listed.

Step Four - Installing Resource Packs
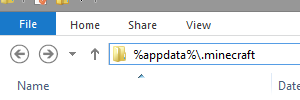
Open your .minecraft folder. It can be found by going to %appdata%\.minecraft or by opening the Minecraft Launcher and clicking Edit Profile then clicking Open Game Dir.
If it doesn’t exist, create a folder named resources in the .minecraft folder.
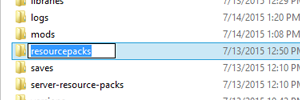
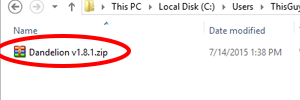
Copy any resource packs you want into the resources folder.
To uninstall a resource pack, remove it from the resources folder.
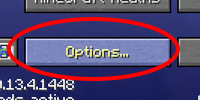
Open the game and click on Options… then Resource Packs…
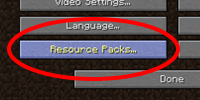
Click on the icon for a resource pack to add it to the Selected Resource Packs category.
Click Done to save changes.